Rube Goldberg Machine Theme: Candy
A Rube Goldberg Project is a complicated order of events that perform a single task, in a sort of chain reaction. For our project, we had to create a Rube Goldberg Machine with at least 10 steps, and 5 simple machines. But for every Rube Goldberg project, there has to be a goal. In this project, we use up to 12 events just to put sprinkles and whipped cream on a cookie, being that the delicious whip cream and sprinkled cookie is our goal.
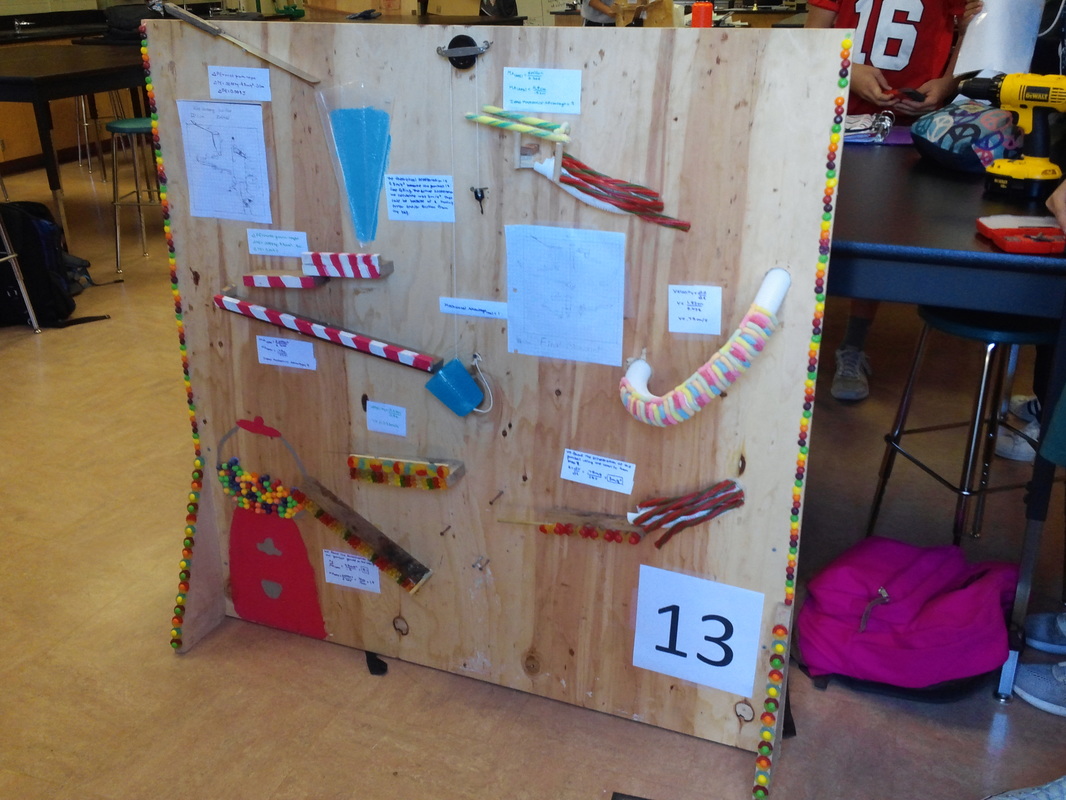
So where did we start? We started by creating our blueprint for the project, and to make it different from the rest, we added a theme to our project, something that we can base our it around. Our specific theme was candy, and we decorated our project around it, with walls of skittles, tubes of gummy worms, and platforms sided with lifesavers.
So where did we start? We started by creating our blueprint for the project, and to make it different from the rest, we added a theme to our project, something that we can base our it around. Our specific theme was candy, and we decorated our project around it, with walls of skittles, tubes of gummy worms, and platforms sided with lifesavers.
Timeline
But in order to decorate our candy-filled project, we needed to have a project in the first place. How did we start? Why with the building blocks of course. For this project, the building blocks were the ramps. Since the ramps were the easiest to make, we started there, but then added more things like the tube, wheel and axle, and the pulley system. After that, we started working on the whip cream machine and the lever that shoots out the sprinkles. After we finished the whip cream machine and the lever, we started the final step, which was applying the theme. Our theme was candy, so we showed our theme by decorating our machine with candy.
|
|
Day 1: We started a blueprint and chose a theme.
Day 2: We then finished the blueprint, and got a board to build. Day 3: We started building by drilling in the starting ramps and nailing in the rest for the Spatula. We also screwed the stands in to keep the machine sturdy. Day 4: We then started to drill big holes for the tube to go into, and planned out where our ramps went. Day 5: We finished the drilling of holes for the tubes, and created the base for the wheel and axle. We also drilled the tube in. Day 6: After we were done with the tubing we started making the pulley system and made the start for the second ball. Day 7: We finished the pulley system and made the ending ramp for the tube. We then started on the lever and whip cream contraption. Day 8: We worked on the lever this day, and made some more tweaks to the pulley to make it more efficient. Day 9: Lastly, we finished our whip cream contraption and decorated our machine using the candy theme. |
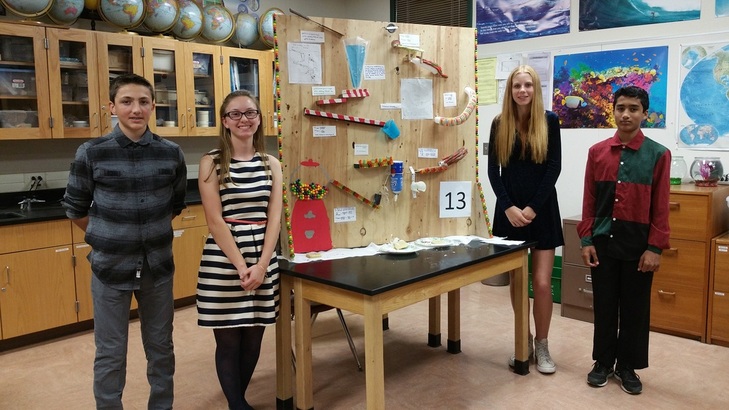
So what was the final result. For all of this work, what did we get? We got a finished, working, Rube Goldberg project. Well, not really. It didn't work every single time. Most of the small steps worked, but the simple machines were constantly failing, and when we fixed one problem, another one came up. But in the end, that's not what it's about. It's about how you present your product, and bring the best out of it. We tried to present the project in the most professional manner we could, in formal clothes at the STEM house. We showed the most important parts of the project, the 5 simple machines and explained what each of them did. We also talked about the specific calculations of the mechanical advantage and kinetic energy, but at the same time made it more entertaining and easy to understand, so everyone would not only understand what we were saying, but it also would be flowing and easy to listen to.
Content:
Making a Rube Goldberg Machine requires more than just simple planning and drilling. There is a reason why all of the simple machines work. That's where all of the calculations come in. For this project, we calculated the energy transfers, mechanical advantages, and many other measures using the physics equations we learned in class. I think that was very important to do this because it is very good to apply what you learn in school to a real-life situation. For the sake of organization, I have split the terms into two categories: ones that we calculated measurements in labeled "Measures", and the machines we used like the pulley and ramp, labeled "Machines".
Measures: |
Machines: |
|
Velocity-the speed in a certain direction. This unit is measured in meters per second(m/s).
Acceleration- The change of velocity during a unit of time. The unit is measured in meters per second squared(m/s^2). Mechanical Advantage- The mechanical advantage tells you how many times easier a machine is, and has no unit because it is a indication and is not measured in a certain unit. Potential Energy- Potential Energy, or more specifically, the change in Potential Energy. This was mainly used to show how energy was transferred, changed, and lost due to friction through our simple machines. It is measured in Joules(J). |
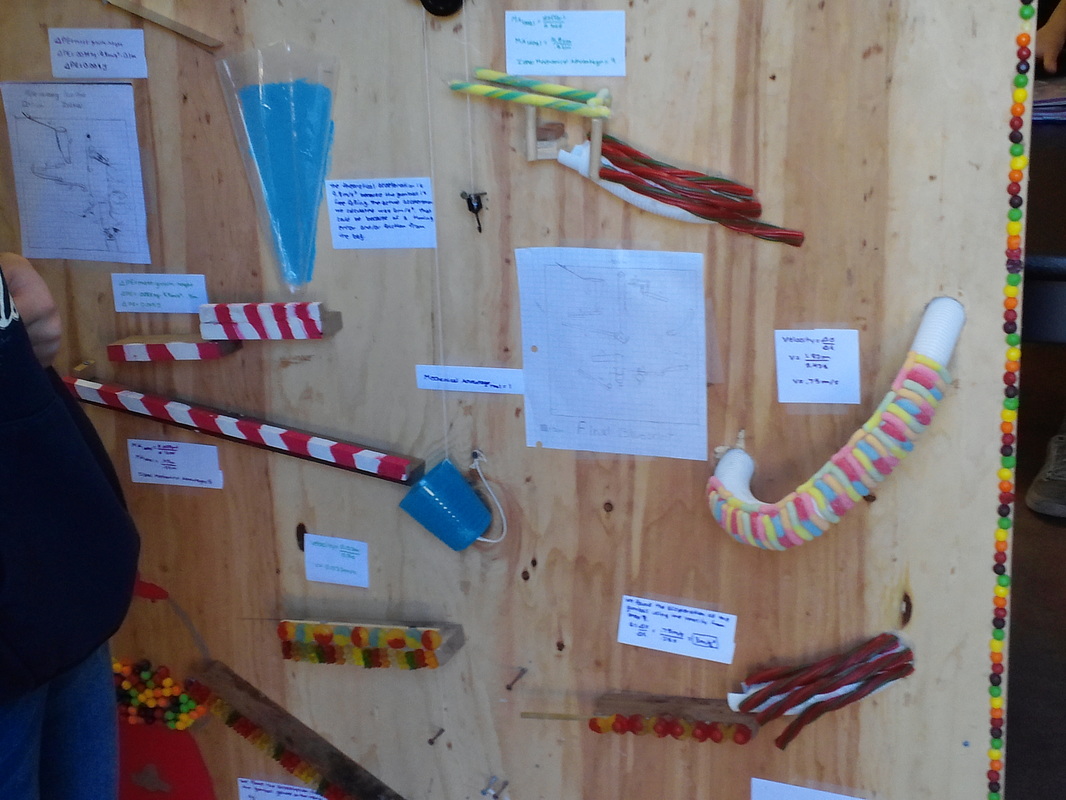
Incline Plane-Like a ramp. The steeper it is, the more force you use, and the more gradual the slope is, the less force you use.
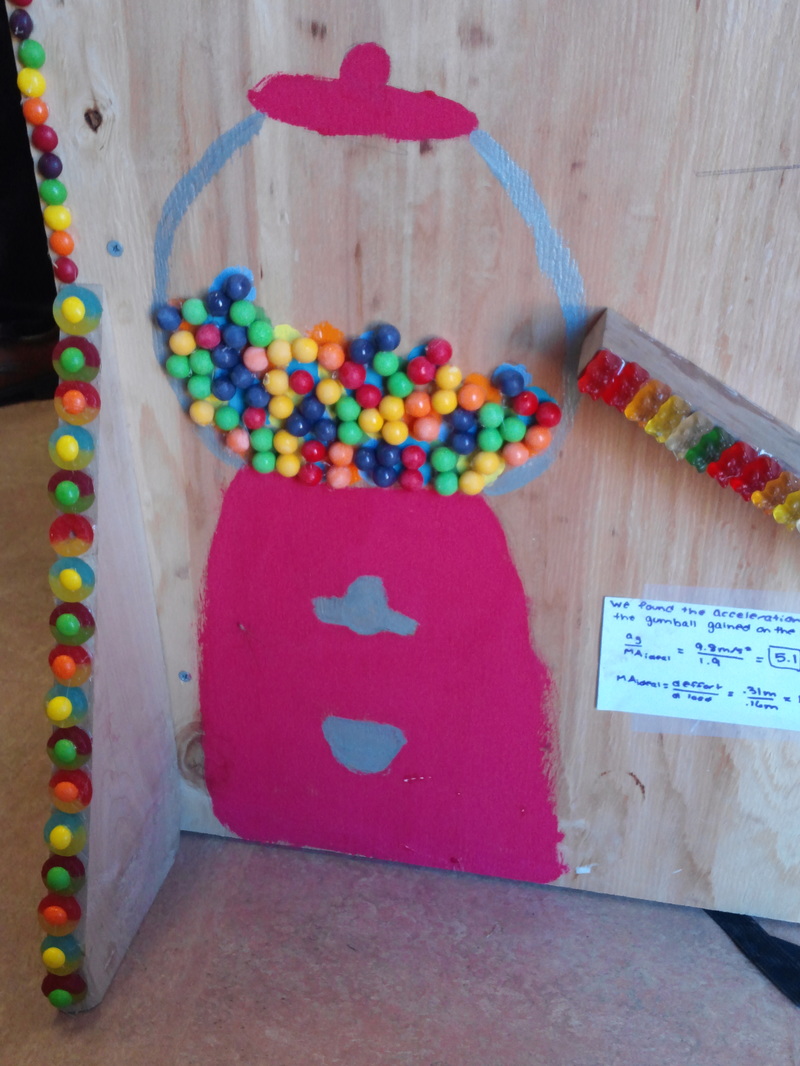
Pulley- Pulleys can lift loads by bringing others down, making great tools from transferring energy from one side of the board to another. Our two weights for our pulley were a cup and a normal weight. Once the ball went into the cup, the cup dropped, lifting the weight to hit the second gumball, leading into our screw effect. Screw- A screw is basically a spiral in physics, and in fact, we used one in our Rube Goldberg Machine. We found the mechanical advantage with the ideal equation MA = effort/load. We measured the effort by putting a string through the tube, and found the load by measuring the height, and then found the ideal mechanical advantage by solving the equation. Lever- In our project, we used a lever for our cup. The ways levers work are when a force is exerted on one side, it sends an alternate force on the other side, kind of like a seesaw. Wheel & Axle- In our project, the pulley causes the weight to hit the wheel & axle, starting the wheel & axle effect. You see, the weight hits the axle, causing it to spin, forcing the wheel to move along with it. |
Reflection:
I think two things I did well for this project were being prepared for the project and supporting my group members. One way I was prepared was I came and provided the necessary materials for the project, like the whip cream for the contraption, and the sheet containing the timeline of the assignment. Even though responsibility is an important part of group projects, you must be able to empathize and support your group. Even though I didn't agree with all of my groups ideas, I did support them on using them, which lead to one skill I learned, which was to be more open-minded. I learned that i'm used to being the leader in group activities, so it is hard for me to back down at times. But this project has taught me that, and I thank it for doing so. Because surprisingly, a very important trait of a good leader is to back down, because you never know, people can come up with better ideas that you would've never thought of.
At the same time, backing down too much is not a good thing. Sadly, that's what I did in this project. Sometimes I thought that I had good ideas, but never bothered to say them because I was afraid my group would ignore them, but in the end, they used the idea I never said but knew the whole time. All this extra backing down does is waste time, and time is of the essence during group projects. So I really need to step out of my comfort zone, and give myself the chance to speak. Another thing I need to improve is my listening and learning skill. It might just be that I am a slow learner, but I never seem to understand concepts quickly. For example, when we got to calculations in STEM, at first, I didn't know what to do. It took me a while to understand, which really formed a problem during the time we had with our group. Although I still figured it out, I still need to do something about my slow learning skill, because it really will hurt me in the future.
At the same time, backing down too much is not a good thing. Sadly, that's what I did in this project. Sometimes I thought that I had good ideas, but never bothered to say them because I was afraid my group would ignore them, but in the end, they used the idea I never said but knew the whole time. All this extra backing down does is waste time, and time is of the essence during group projects. So I really need to step out of my comfort zone, and give myself the chance to speak. Another thing I need to improve is my listening and learning skill. It might just be that I am a slow learner, but I never seem to understand concepts quickly. For example, when we got to calculations in STEM, at first, I didn't know what to do. It took me a while to understand, which really formed a problem during the time we had with our group. Although I still figured it out, I still need to do something about my slow learning skill, because it really will hurt me in the future.
