Solar Water Heater:
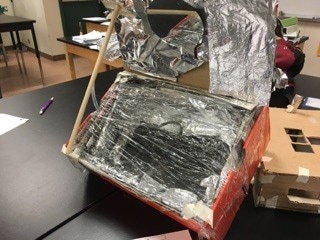
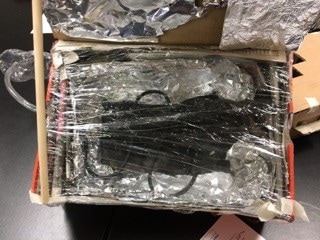
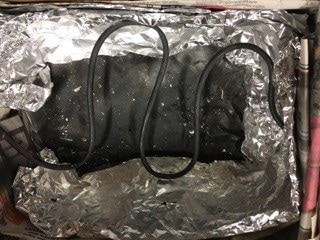
The first project we did as a group was create a water heater powered by solar energy.
We did this by creating a radiation and insulation system where the sun would give off energy to the saran wrap inside the box which would heat up and insulate the pipe. This system gives and keeps heat inside the pipe where water is, and it is kept at it's new temperature.
We did this by creating a radiation and insulation system where the sun would give off energy to the saran wrap inside the box which would heat up and insulate the pipe. This system gives and keeps heat inside the pipe where water is, and it is kept at it's new temperature.
|
|
|
|
|
|
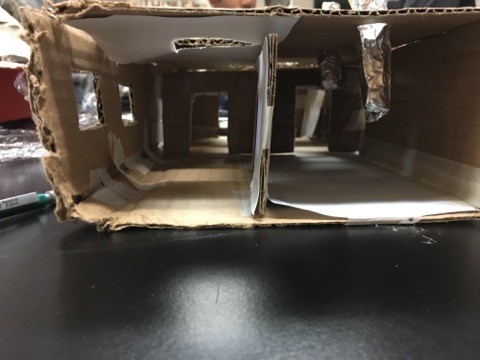
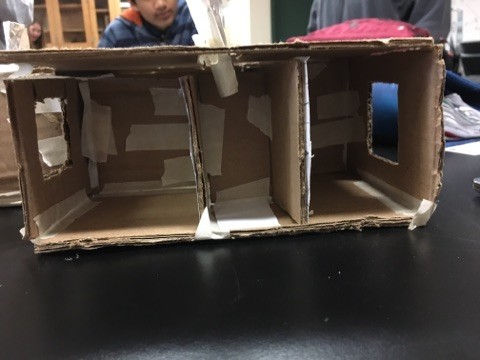
Day-lighting Cardboard House:
|
|
|
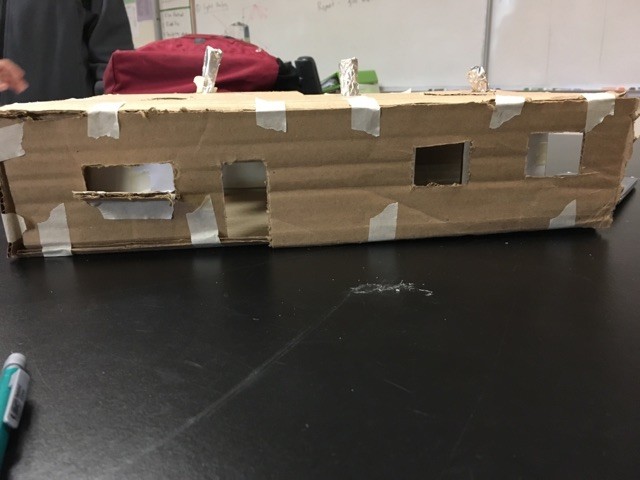
After the Solar Water Heater, we explored some day-lighting techniques. We were given a packet explaining the most effective ways of day-lighting and the science behind it. After learning about this, we designed a cardboard house and worked on it to have the most amount of light for a 24-hour cycle. We tested it by putting the house in an area with very little light and placing a light-bulb inside it, and recording what percentage of light was in the house. Here were the results:

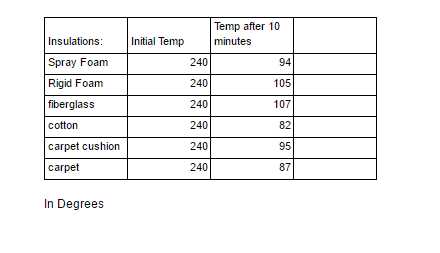
Materials Testing Heat Lab:
After knowing how to reflect light, we started focusing more on what materials would be effective in doing so. Because of this, we started a lab where we heated a material and insulated it with different materials to see which one preserved the most heat. Here is a table that contains our data:
The rest of the document is here.
This information helped us come to the conclusion that Fiberglass is the best insulator out of all of the materials we tested.
HERE IS THE ANALYSIS I WROTE ON THIS LAB.
This information helped us come to the conclusion that Fiberglass is the best insulator out of all of the materials we tested.
HERE IS THE ANALYSIS I WROTE ON THIS LAB.
Building Design:
When we finished the Material Testing Lab, we started designing our building. Here are some of the things we did in the process.
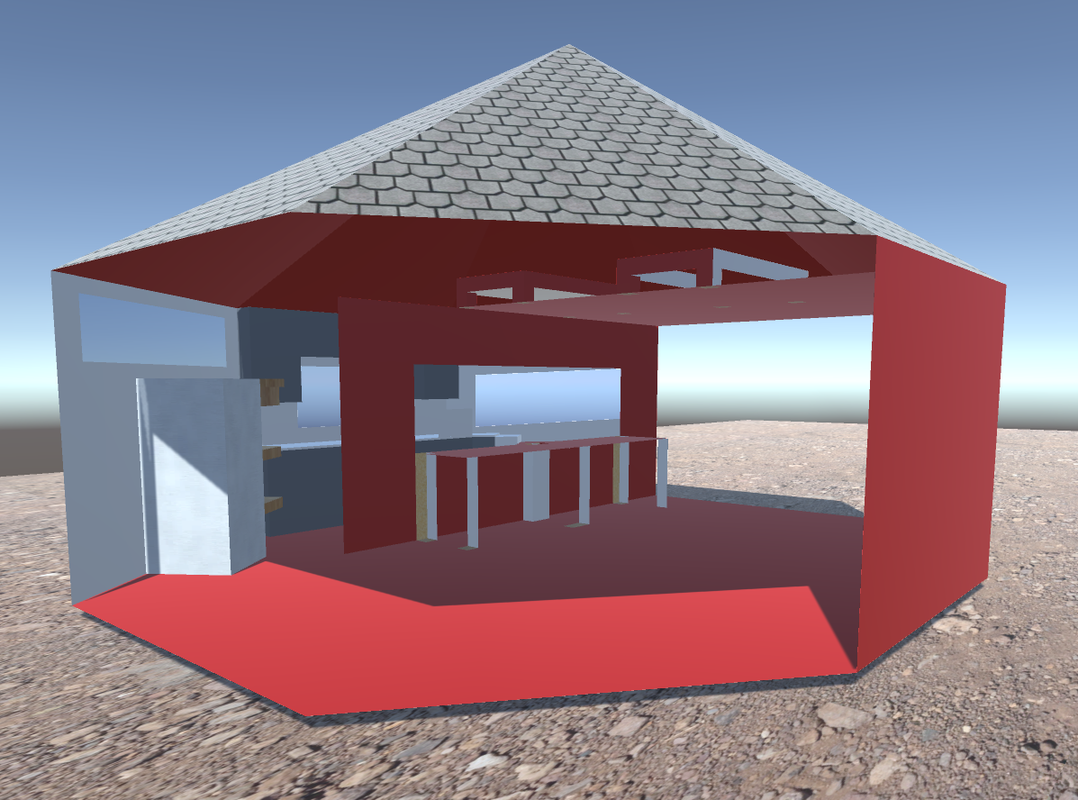
3d Model:
While creating the blueprints, we started the 3d model of the house. Here are some images of the house and you can find the rest of the files below.
|
|
|
| model_1__outside_and_inside_.skp |
| model_2__outside_only_.skp |
| model_3__inside_only_.skp |
Special Simulation:
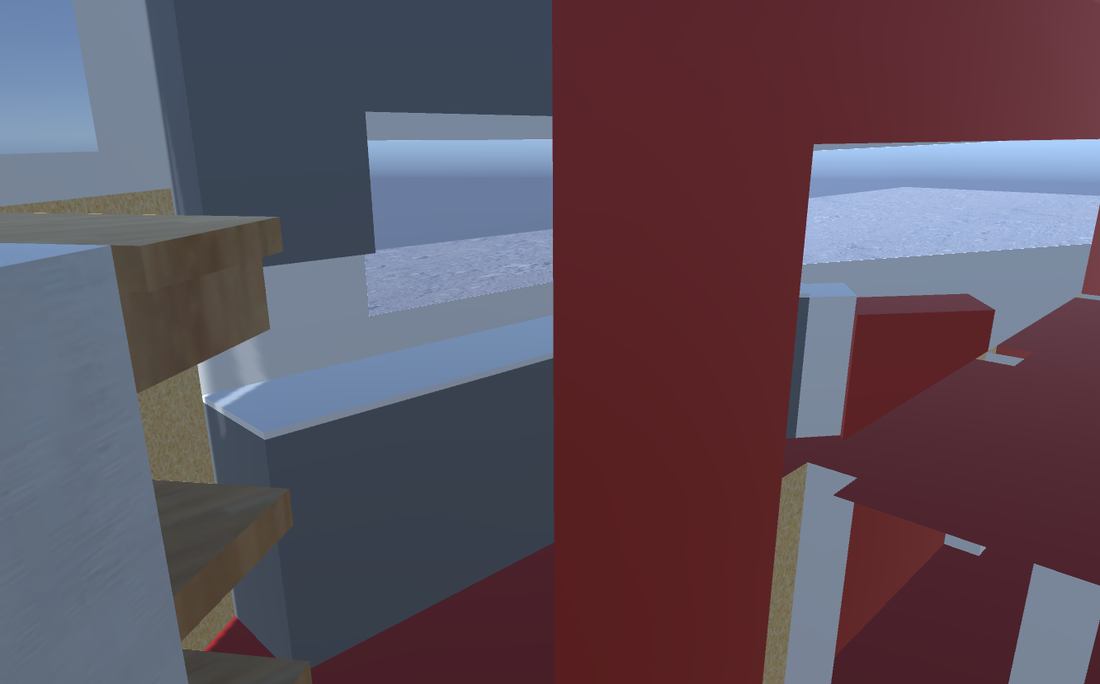
I also created a simulation of the house in Unity, a cross-platform engine for 3d and 2d games. You can find it right here: (You cannot play the simulation without the data file in the same directory. So first get the data file and Unity build in the same place, and then click the Unity build.)
|
|
| simulation_data.zip |
| simulation.zip |
PowerPoint Presentation:
Here is the PowerPoint we presented that describes the whole project.
Blueprints:
After the scale model and simulation, we did the blueprints, which you can see here:
Top View Framing: |
Wall Blueprint: |
These blueprints helped us create our house and are useful for communicating our design to constructors.
Materials List/Budget:
After figuring out all of the materials we needed for the house, we found the cost of each item and found out the final cost. You can find it here:
You can find the spreadsheet here.
Edit: The final cost is not listed there, but it was shown in the PowerPoint. The total cost is $19,775.84.
You can find the spreadsheet here.
Edit: The final cost is not listed there, but it was shown in the PowerPoint. The total cost is $19,775.84.
Wind Turbine Lab:
Another side project that we did during this Tiny House build was a Wind Turbine Lab. In summary, we created and tested different wind turbines to see which one flew the fastest. Here were our results:
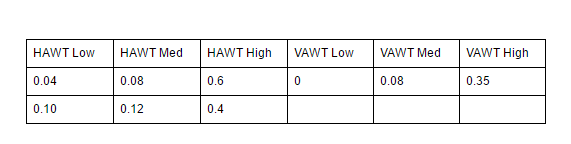
After collecting all of the data, we created a claim evidence poster where we wrote down what we discovered from this lab experiment. After that, we created a claim or conclusion based on the data and explained it on a poster, which you can see here:
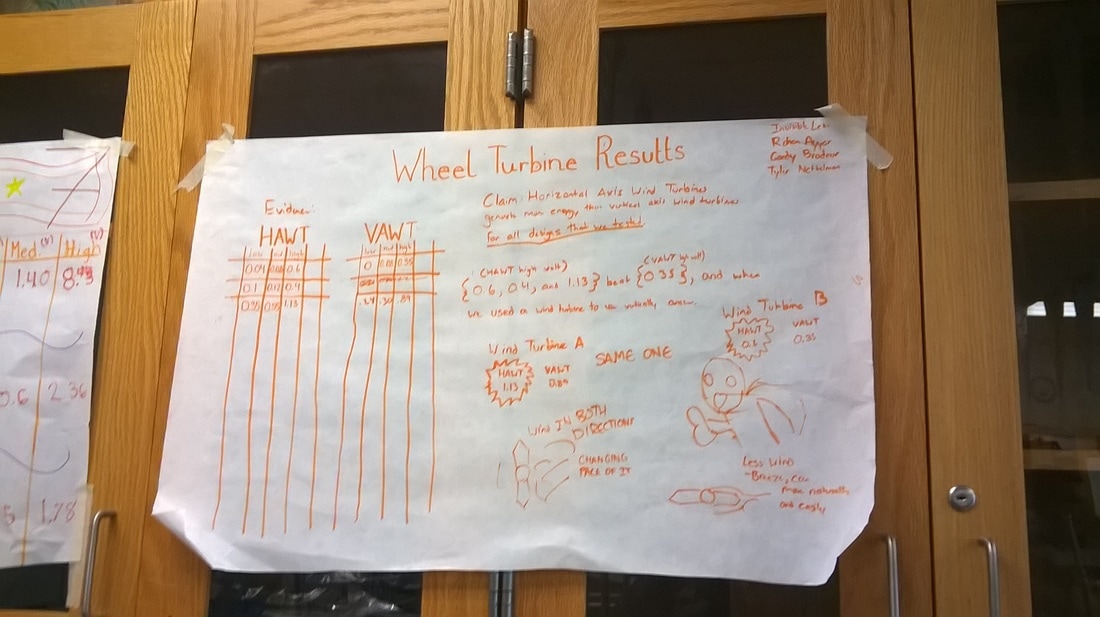
After many different trials, we came to the conclusion that for all of the designs that we tested, Horizontal Axis Wind Turbines prove to be better than Vertical Axis Wind Turbines. We created a poster that stated our evidence and reasoning for our claim.
Energy Justification Document: In class, we conducted research on light as a team and made some conclusions based off our data. Our group had to explain the greenhouse effect, the carbon cycle and the sun's energy. You can see the document here.
Energy Justification Document: In class, we conducted research on light as a team and made some conclusions based off our data. Our group had to explain the greenhouse effect, the carbon cycle and the sun's energy. You can see the document here.
Content:
While designing our heater, we learned about radiation, convection, conduction, and insulation.
Radiation: Radiation is energy given off in the form of electromagnetic waves. In this case, the sun was the source providing the energy (radiation) which provided light for the house.
Convection: Convection is a transfer method where hotter material rises and colder material sinks due to gravity, which transfers heat.
Conduction: Conduction is when heat is transferred through a material. For example, if you place metal on a heater, the heat from the front of the piece of metal will almost immediately transfer to the end in which you are holding it, which will most probably burn you.
Insulation: Insulation is the process of adding materials between a certain object to keep it from losing heat. (or sound, but not for this project) It's like preserving a smell in a bag by making it so compact that the smell cannot leave.
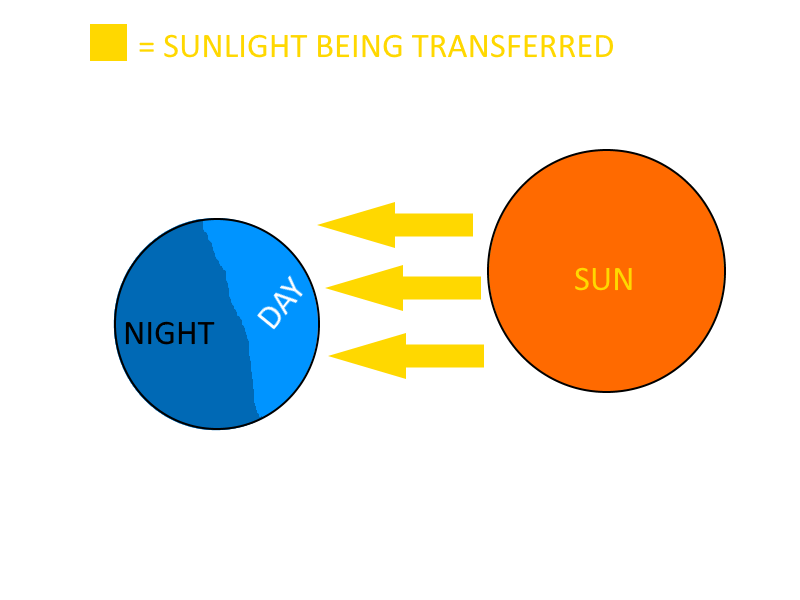
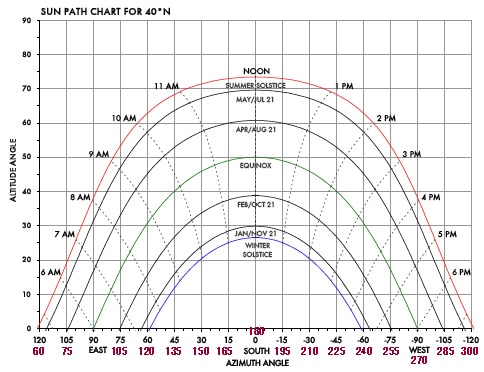
Solar Angles: Before we went on to day-lighting techniques, we needed to know how the sunlight angles react to the four seasons (winter, spring, summer, fall). Because the Earth is not one-sided, the sun cannot face the whole planet and only focuses on one side at a time. But the reason all of the countries are getting heat during times of the year is because the Earth has an unnatural tilt that keeps it constantly in motion so it rotates during the year. There is a diagram under that I made that shows the sunlight being transferred and a graph of it on the right.
Radiation: Radiation is energy given off in the form of electromagnetic waves. In this case, the sun was the source providing the energy (radiation) which provided light for the house.
Convection: Convection is a transfer method where hotter material rises and colder material sinks due to gravity, which transfers heat.
Conduction: Conduction is when heat is transferred through a material. For example, if you place metal on a heater, the heat from the front of the piece of metal will almost immediately transfer to the end in which you are holding it, which will most probably burn you.
Insulation: Insulation is the process of adding materials between a certain object to keep it from losing heat. (or sound, but not for this project) It's like preserving a smell in a bag by making it so compact that the smell cannot leave.
Solar Angles: Before we went on to day-lighting techniques, we needed to know how the sunlight angles react to the four seasons (winter, spring, summer, fall). Because the Earth is not one-sided, the sun cannot face the whole planet and only focuses on one side at a time. But the reason all of the countries are getting heat during times of the year is because the Earth has an unnatural tilt that keeps it constantly in motion so it rotates during the year. There is a diagram under that I made that shows the sunlight being transferred and a graph of it on the right.
|
|
Day-Lighting Techniques: Here are some of the Day-Lighting techniques and tricks we used to create our solar house.
Skylights: A window on the roof or ceiling. We put a skylight at the center of the ceiling in our yurt.
Reflective Walls: Another thing we added was white walls because we found out that the color white reflects light, so we intentionally set up white walls so we could keep as much heat and light inside the house as possible.
Windows that face south: Because the sunlight for our solar house comes from the south, we tried to add as many walls as possible, so we could get as much light and heat as we could.
Solar Tubes: What's a solar house without solar tubes? These solar tubes are used to transfer light to certain rooms. We added one in the bathroom so the bathroom could get more light and heat.
Specific Heat Capacity: The specific heat capacity is how well or bad an object holds heat capacity. For example, water has a high specific heat capacity because although it takes a long time to heat up, it takes a long time to lose heat. So you can look at water as a liquid that barely changes. Iron on the other hand, has a low heat capacity because although it easily heats up, it also easily loses heat. You can look at Iron as an object that easily changes.
Reflection:
The final result of this project was good, but I feel like the leadership and communication could've been improved. Everything started off good, but then we all got angry when things wouldn't go our way. I did do a good job in this project because I worked really well on the scale model and thought outside the box by making a simulation of the house. I think I should have improved on my patience and leadership, but I think both of those qualities have been improving ever since I got into this class. In the end, this project really shows that although I haven't made it yet, I am progressing as a better leader with every project that I do.
