Species Presentation:
Description:
For this project, we had to choose an organism alive today and create a visual story (timeline) of how it evolved over time. We started our timeline with the earliest ancestor of this species found and explained the historical events that led it to become the modern day living organism, the Polar Bear. We chose the Polar Bear and in this project, showed how the earliest known ancestor transformed into the animal icon we know today.
In order to complete this project, we had to work on it step by step. The first thing we had to do was pick a species to investigate.
After deciding on the Polar Bear, we then had to find reliable sources to support theories on evolution and DNA similarity between ancestors of the polar bear. To keep it simple, these sources basically proved what we said was correct. Once we had gathered all of the information, we had to create a timeline showing how and why the organism changed over time. This wasn't a hard step because we had already gathered all of the information. After creating this timeline, we presented to peers so we could find out what we needed to work on for the final presentation. Using these critiques, we then made edits on our presentation to make it as professional and good as possible. Lastly, we presented our timeline to the class.
Final Product: By the end of this project, we had a full presentation showing the Polar Bears timeline and how it slowly became what it is. The presentation is shown below:
Reflection: Overall, I think this project was a very hard one. Although we did have a lot of time, it felt like we weren't really guided on what to do. Honestly, I felt like we were just handed the assignment with not much understanding and given a time frame to do it. However, there still was a lot of things that I did well and things that I could work on.
One thing I learned about myself was I am very efficient and able to get work done. For example, before we decided on the Polar Bear our species was the Arctic Fox. On the last day, however, we realized we could not find enough information and we had to start over. This meant that we had to do a 2-week project in one day. I tried to split the work with my partner, but he did not follow through with anything I said. I had to take it into my own hands. The night before the presentation, I put my blood, sweat, and tears into the project and got it done before the end of the day. This efficiency is something I am proud of and I feel like it was a big help to the assignment. Another thing I learned about myself was that I take projects very seriously. During this project, I was always a step ahead and knew what to do. I worked as hard as I could just to make the presentation look as professional and simple as possible.
Although there were many things that I did well, there still are some things that I need to improve on. For example, I could have focused earlier in the project and dropped the Arctic Fox species so we had more time to work on the Polar Bear. I also could've delegated more work to my partner so this project would've been more of a team effort.
A pit in the project was when we had to completely start over from scratch because we didn't have enough information for the Arctic Fox. At this point, I was completely devastated and felt like we couldn't finish the project. A peak during this assignment was when we presented it. At this point, we were completely prepared and ready and I delivered this presentation in an enthusiastic and professional way.
Content:
Content:
Common Ancestor: A species that shares the same direct ancestor but is not directly related. (ex: cousin)
Direct Ancestor: An ancestor that is related to another in a direct-line. (ex: parent and child)
Fossils: the remains of a prehistoric organism preserved in rock.
DNA: deoxyribonucleic acid, a self-replicating material present in nearly all living organisms. It is the carrier of genetic information.
Evolution: The process of change and development from previous forms due to natural selection.
Natural Selection: The process in where organisms better fitted to the environment tend to survive and reproduce while the organisms who are not fitted to the environment die off.
Cladogram: A diagram showing the relationships between species.
Cladogram Project:
Description:
For this project, we had to demonstrate our knowledge of cladograms and evolution by creating a cladogram using different types of screws and explaining how they fitted or didn't fit in their environment. We had to divide the species into domains, classes, and other forms of classification and create a Latin-inspired name for each one. We then presented our findings to the class and explained how they fitted with their environment.
Final Product:
Reflection: I think that this project went fairly well. One skill I gained was managing my group well. One thing I learned about myself was that I can fool around sometimes, but when we have a limited amount of time and need to get a task done I will kick into overdrive and work extremely hard until I get that job done. One thing I should improve is leniency. I could've been more lenient with my group during the project. I also should work on having rougher skin when being a leader. During the project, my peers loved to pick on me a lot. I took a lot of it personally and that almost stopped me from contributing to this project and making it better. Fortunately, I am getting better at that.
Laboratory Report:
Purpose/Problem: The purpose of this lab was to use our DNA and Alu repeats to determine how old our genes are and where they started.
Hypothesis: Our hypothesis was that the lab results would give us the typing, age, and location of our genetics. Our predicted outcome was that the age would be dated to a long time ago and located most probably in Africa.
Procedure:
Citation: http://babec.org/wp-content/uploads/2016/12/Alu_Student_Guide_2017.pdf
DNA Saline Procedure:
PCR (Polymerase Chain Reaction) Procedure:
Data/Observation:
Hypothesis: Our hypothesis was that the lab results would give us the typing, age, and location of our genetics. Our predicted outcome was that the age would be dated to a long time ago and located most probably in Africa.
Procedure:
Citation: http://babec.org/wp-content/uploads/2016/12/Alu_Student_Guide_2017.pdf
DNA Saline Procedure:
- We swirled 10 mL of saline in your mouth for 30 seconds.
- Spit the saline back into the cup and swirl it to mix the cells.
- Label a microfuge with your initials.
- Transfer 1.5 mL of the saline into the microfuge container.
- Pellet the cells by centrifuging it for one minute. (speed should be 10,000 rpm)
- Check cell pellet with your teacher to make sure it’s sufficient.
- Check to make sure 0.1 mL of saline are covering the cell pellet.
- Obtain a chelex tube from your teacher and label it with your initials.
- Add all of your cell suspension to the chelex and flick the tube to mix.
- But your chelex tube in a heat block for 10 minutes.
- Centrifuge your hot tube for 1 minute.
- Obtain another 1.5 mL microfuge tube and label it DNA.
- Move 0.05 mL of the liquid from your old tube to your new one.
- Have teacher check tube to make sure no Chelex beads are there.
- Place DNA tube in the class rack.
PCR (Polymerase Chain Reaction) Procedure:
- Obtain a tiny PCR tube and label it with your initials.
- Add 0.02 mL of Master Mix into PCR tube.
- Add 0.02 mL of Primer Mix into PCR tube.
- Add 0.01 mL of DNA into the PCR tube. You should have 0.05 mL in your PCR tube so far.
- Two students will be asked to set up the positive control reactions (+C) for the class. They will use the positive control DNA provided in the kit. There should be enough +C PCR sample for one lane on each gel.
- Another two students will set up negative control reactions for the whole class (–C). They will use sterile water. There should be enough –C PCR sample for one lane on each gel.
- Check the volume of your tube by comparing it with other peoples.
- Place your reaction into the thermal cycler and record the location of your tube on the grid provided by your teacher.
Data/Observation:
|

|
|
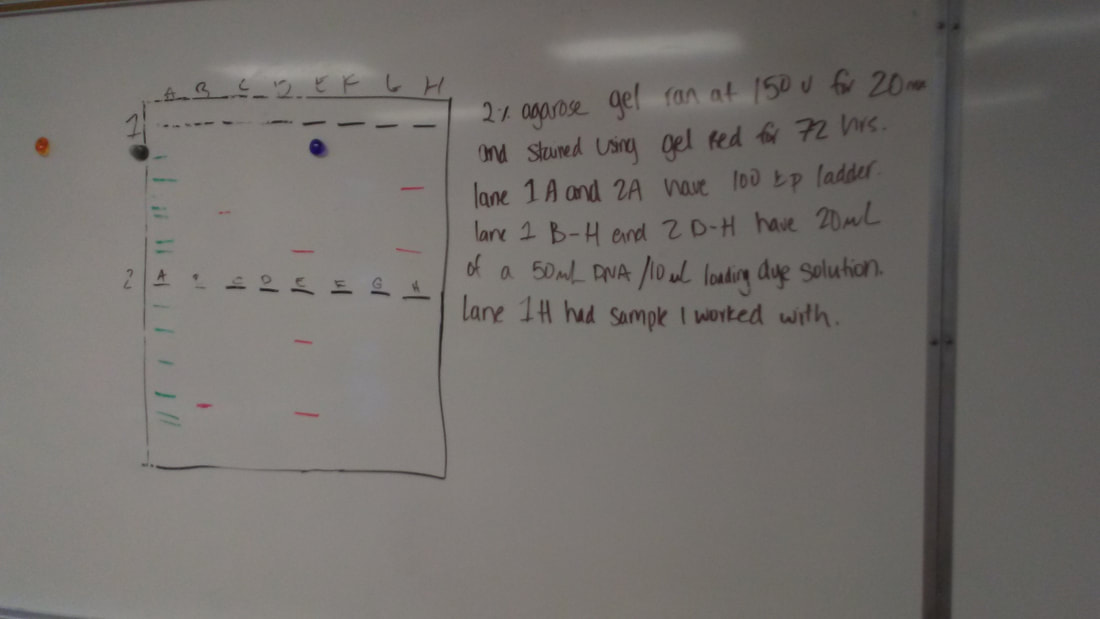
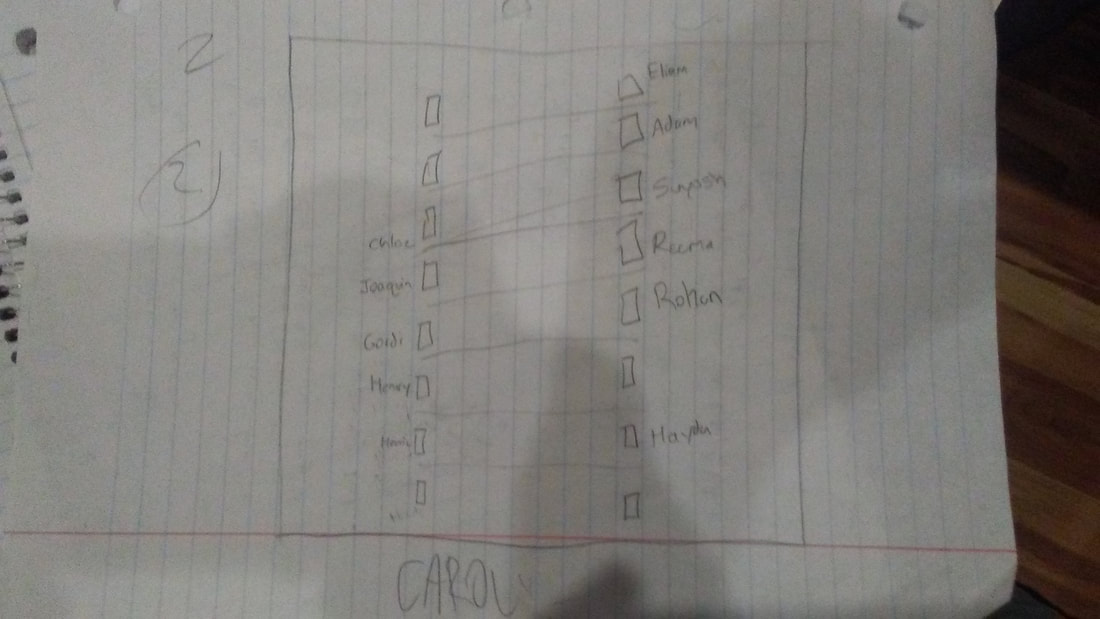
These are the pictures of the actual results. The top right is the box that we measured our results in. The top left contains the names matching the slots in the previous picture. And the last picture shows an example of how the box works and shows the results. If you cannot read the words in the picture, they are listed below:
2% Agarose Gel ran at 150 Volts for 20 minutes and stained using gel red for 72 hours. Lane 1A and 2A have 100 bp ladders. Lane 1 B-H and 2 D-H have 20mL of a 50mL DNA/10 mL loading dye solution. Lane 1H had the sample we worked with.
The box was a purple color and the pink spots were the shining gel red. Also, all of our solutions looked similar but when we put them to the test, very few actually worked.
Observations: (Using see, hear, feel, smell, taste)
We know that +/+ and -/- are heterozygous and +/- is homozygous, so the students that got results would be one of these choices. The hypothesis was not found because the DNA and Alu repeats were supposed to find the age, typing, and location for my genetics, but failed to. Many of the steps were very specific and many people seem to fail on getting the exact amounts. The procedure was easy to understand but still should have been split into parts so students can analyze each section individually before they move on. Because of the lack of results, we can barely gather any data for this project. However, some students seem to find results. We can conclude that using the diagram our teacher created and the gel box, you can find your genotype.
Conclusion:
My claim is if you follow the experiment specifically, you can find your genotype. Evidence for this is when 6 of our students followed the experiment and tried to be as precise as possible and got results. All 6 of those people found their genotypes. However the other 75% of the class did not get any results. Because of this and the fact that we all got the same materials and worked in the time frame, we can conclude that the reason that others didn’t get results is because they didn’t follow the procedure correctly. With this in mind, you can reasonably say that if you follow the procedure correctly, you will get results.
2% Agarose Gel ran at 150 Volts for 20 minutes and stained using gel red for 72 hours. Lane 1A and 2A have 100 bp ladders. Lane 1 B-H and 2 D-H have 20mL of a 50mL DNA/10 mL loading dye solution. Lane 1H had the sample we worked with.
The box was a purple color and the pink spots were the shining gel red. Also, all of our solutions looked similar but when we put them to the test, very few actually worked.
Observations: (Using see, hear, feel, smell, taste)
- When I rinsed the saline in my mouth, I could feel the slight burn on the inside of my cheeks.
- When I was touching the tube, I could feel the slippery, plastic solid.
- I could hear the yelling and talking in the room as I followed through with the experiment.
- I could see the liquid spread all across the tube before I centrifuged it.
- When I was centrifuging the tubes, I could see the tubes spinning at an extremely fast pace.
- When I was centrifuging the tubes, I could hear the slight whizz of the tubes when their spinning at an extremely fast pace.
- I could feel a slight burn on my thumb when I touched the tube right after it had been heated.
- I could hear the continuous chattering when we split the class in half and got into new groups to test and work on the gel box.
- The gel in the gel box felt very mushy and was very fragile.
- I could see a glowing pink from the strong purple in the gel box when we were checking for results.
We know that +/+ and -/- are heterozygous and +/- is homozygous, so the students that got results would be one of these choices. The hypothesis was not found because the DNA and Alu repeats were supposed to find the age, typing, and location for my genetics, but failed to. Many of the steps were very specific and many people seem to fail on getting the exact amounts. The procedure was easy to understand but still should have been split into parts so students can analyze each section individually before they move on. Because of the lack of results, we can barely gather any data for this project. However, some students seem to find results. We can conclude that using the diagram our teacher created and the gel box, you can find your genotype.
Conclusion:
My claim is if you follow the experiment specifically, you can find your genotype. Evidence for this is when 6 of our students followed the experiment and tried to be as precise as possible and got results. All 6 of those people found their genotypes. However the other 75% of the class did not get any results. Because of this and the fact that we all got the same materials and worked in the time frame, we can conclude that the reason that others didn’t get results is because they didn’t follow the procedure correctly. With this in mind, you can reasonably say that if you follow the procedure correctly, you will get results.
